After you completed the auto compensation setup wizard, AutoGate takes to you the gating side of the analysis.
By default, the samples are organized based on the grouping done in the setup wizard. You can change the naming of the samples or grouping by choosing Edit > Select Keywords. The grouping helps when you choose to apply gates for samples within the group or across groups.
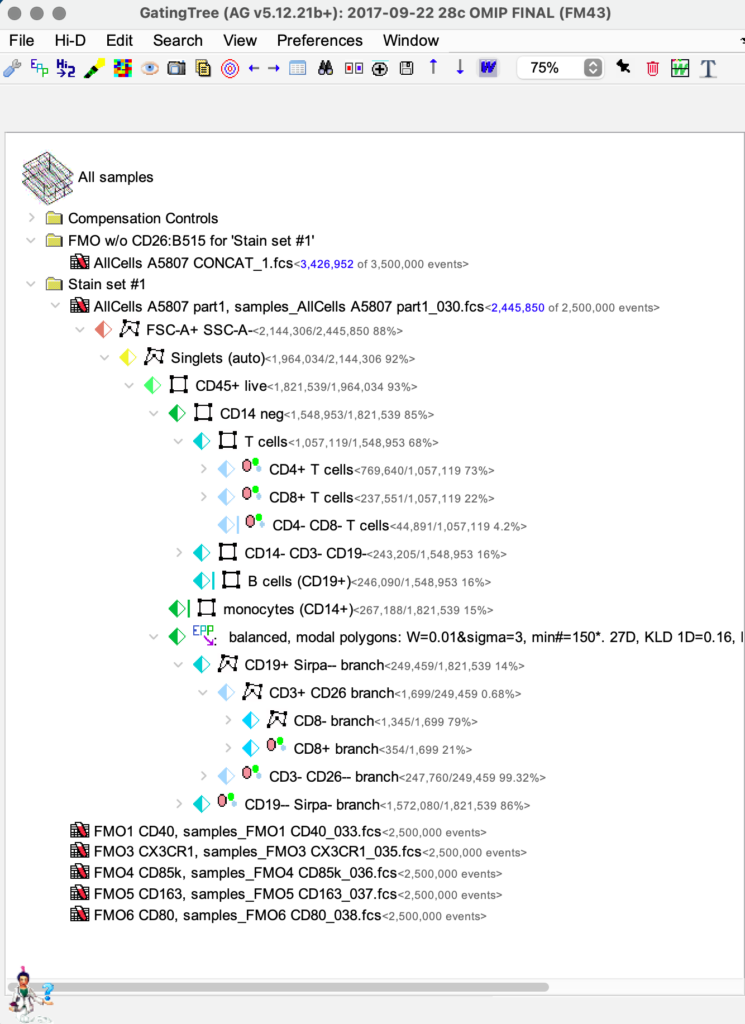
It is important to understand the tree, as this will go a long way in completing your analysis with ease. Navigate through the menus and they are mostly straight foward.
The features are accessible via the right click menus, the toolbar and from the menus at the top of the screen.
To view a sample, double click on the sample and it opens in a plot editor window.
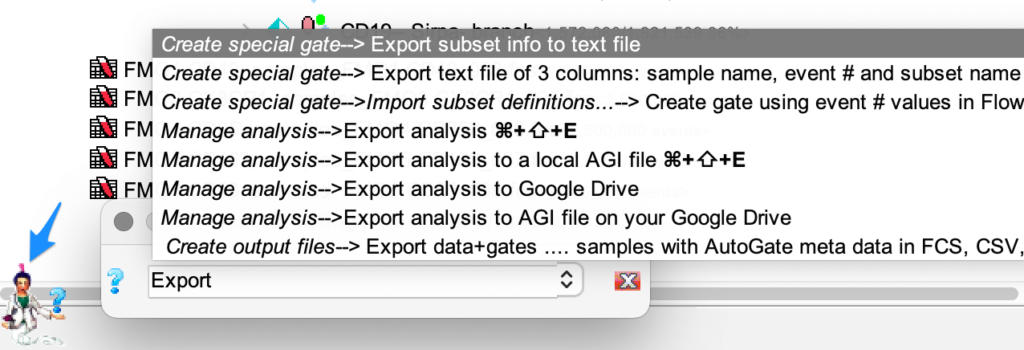
If you are unsure or couldn’t find what you are looking for, just ask GENIE, which is available on the lower left corner of the window.