This step helps you to identify and group your samples as per your experiment needs.
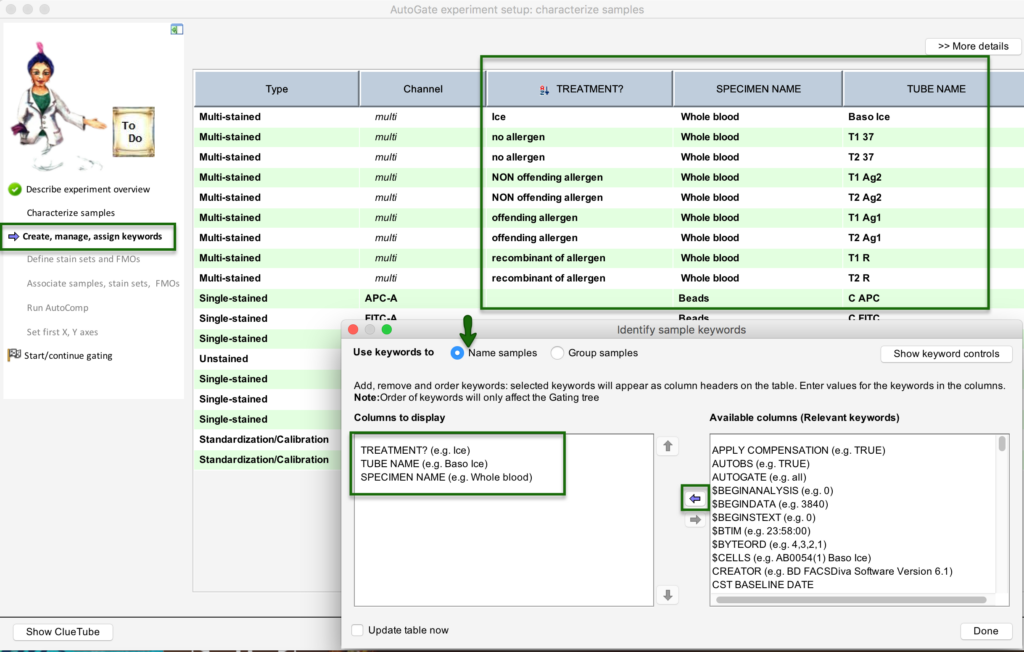
Click to check Name samples or Group samples radio button. In either setting, the left-hand panel shows the column headers to display while the right-hand column lists those that are available. Double-click any item in either panel to move it across to the other panel.
If the left-hand panel does not already show your currently selected column headers, move the ones you want from the right-hand panel. To change the order of column headers in the left-hand column, click any column header and drag it up or down.
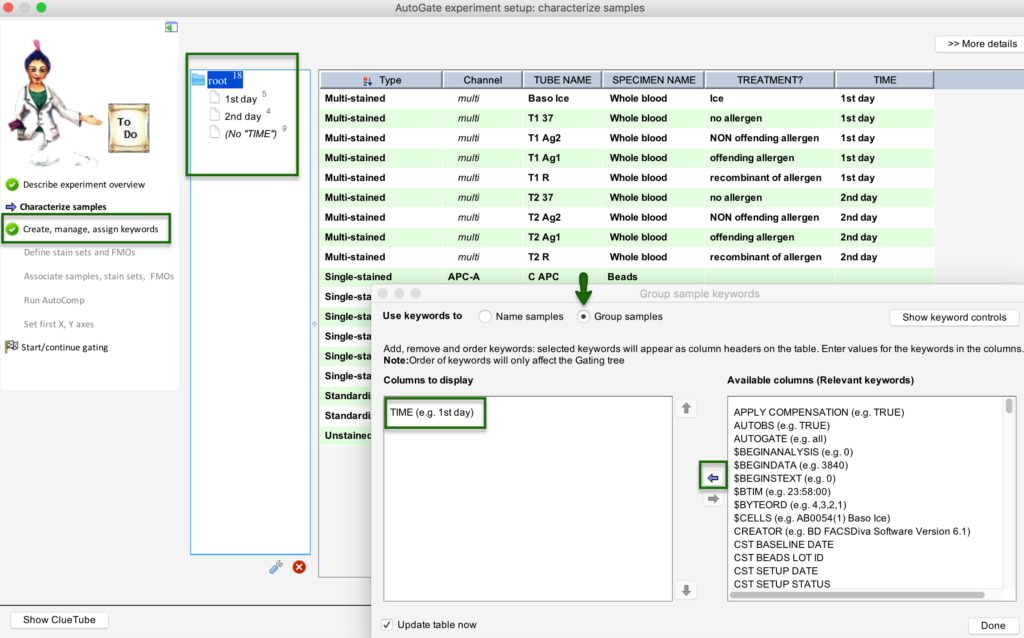
Click Group samples. Most of the commands work exactly as with identifying samples. Select the column headers you want to group together.
Double-click the column headers you have selected. They will move into the left-hand panel.
Click to check Update table now. The grouping will automatically display in a new panel on the Characterize samples window and other tables.
Click the X in the red circle to delete the grouping. Click the wrench icon for other available commands.
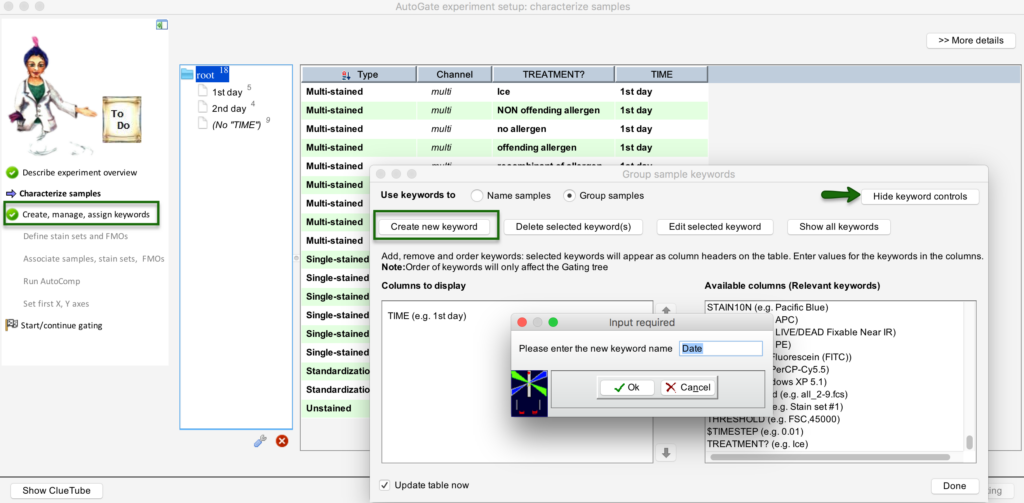
For further options, click to check Show keyword controls.
Click Create new keyword to add a column header of your own. This small screen will display.
Enter the name of your new keyword. Click OK. The name will display in the right-hand column of the keyword screen. New keywords will appear in magenta. Repeat until you have all the new keywords you want to create.